Assistant0 an AI personal assistant that consolidates your digital life by dynamically accessing multiple tools to help you stay organized and efficient. Here’s some of the features that can be implemented:
- Gmail Integration: The assistant regularly scans your inbox to generate concise summaries. It highlights urgent emails, categorizes conversations by importance, and even suggests drafts for quick replies.
- Calendar Management: By interfacing with your calendar, it can remind you of upcoming meetings, check for scheduling conflicts, and even propose the best time slots for new appointments based on your availability.
- Slack Notifications: For team communications, the assistant monitors Slack channels. It identifies key messages and creates action items, ensuring you never miss an important update from your colleagues.
- Google Drive Access: Whether you need immediate access to the latest project document or a file related to a current task, the assistant retrieves pertinent documents from Google Drive on demand. It can create document summaries and even create documents based on your instructions.
With tool-calling capabilities, the possibilities are endless. In this conceptual scenario, the AI agent embodies a digital personal secretary—one that not only processes information but also proactively collates data from connected services to provide comprehensive task management. This level of integration not only enhances efficiency but also ushers in a new era of intelligent automation, where digital assistants serve as reliable, all-in-one solutions that tailor themselves to your personal and professional needs.
Building such an assistant is not that difficult. Thanks to frameworks like LangChain, LlamaIndex, and Vercel AI, you can get started quickly. The difficult part is doing it securely so that you can protect the user's data and credentials.
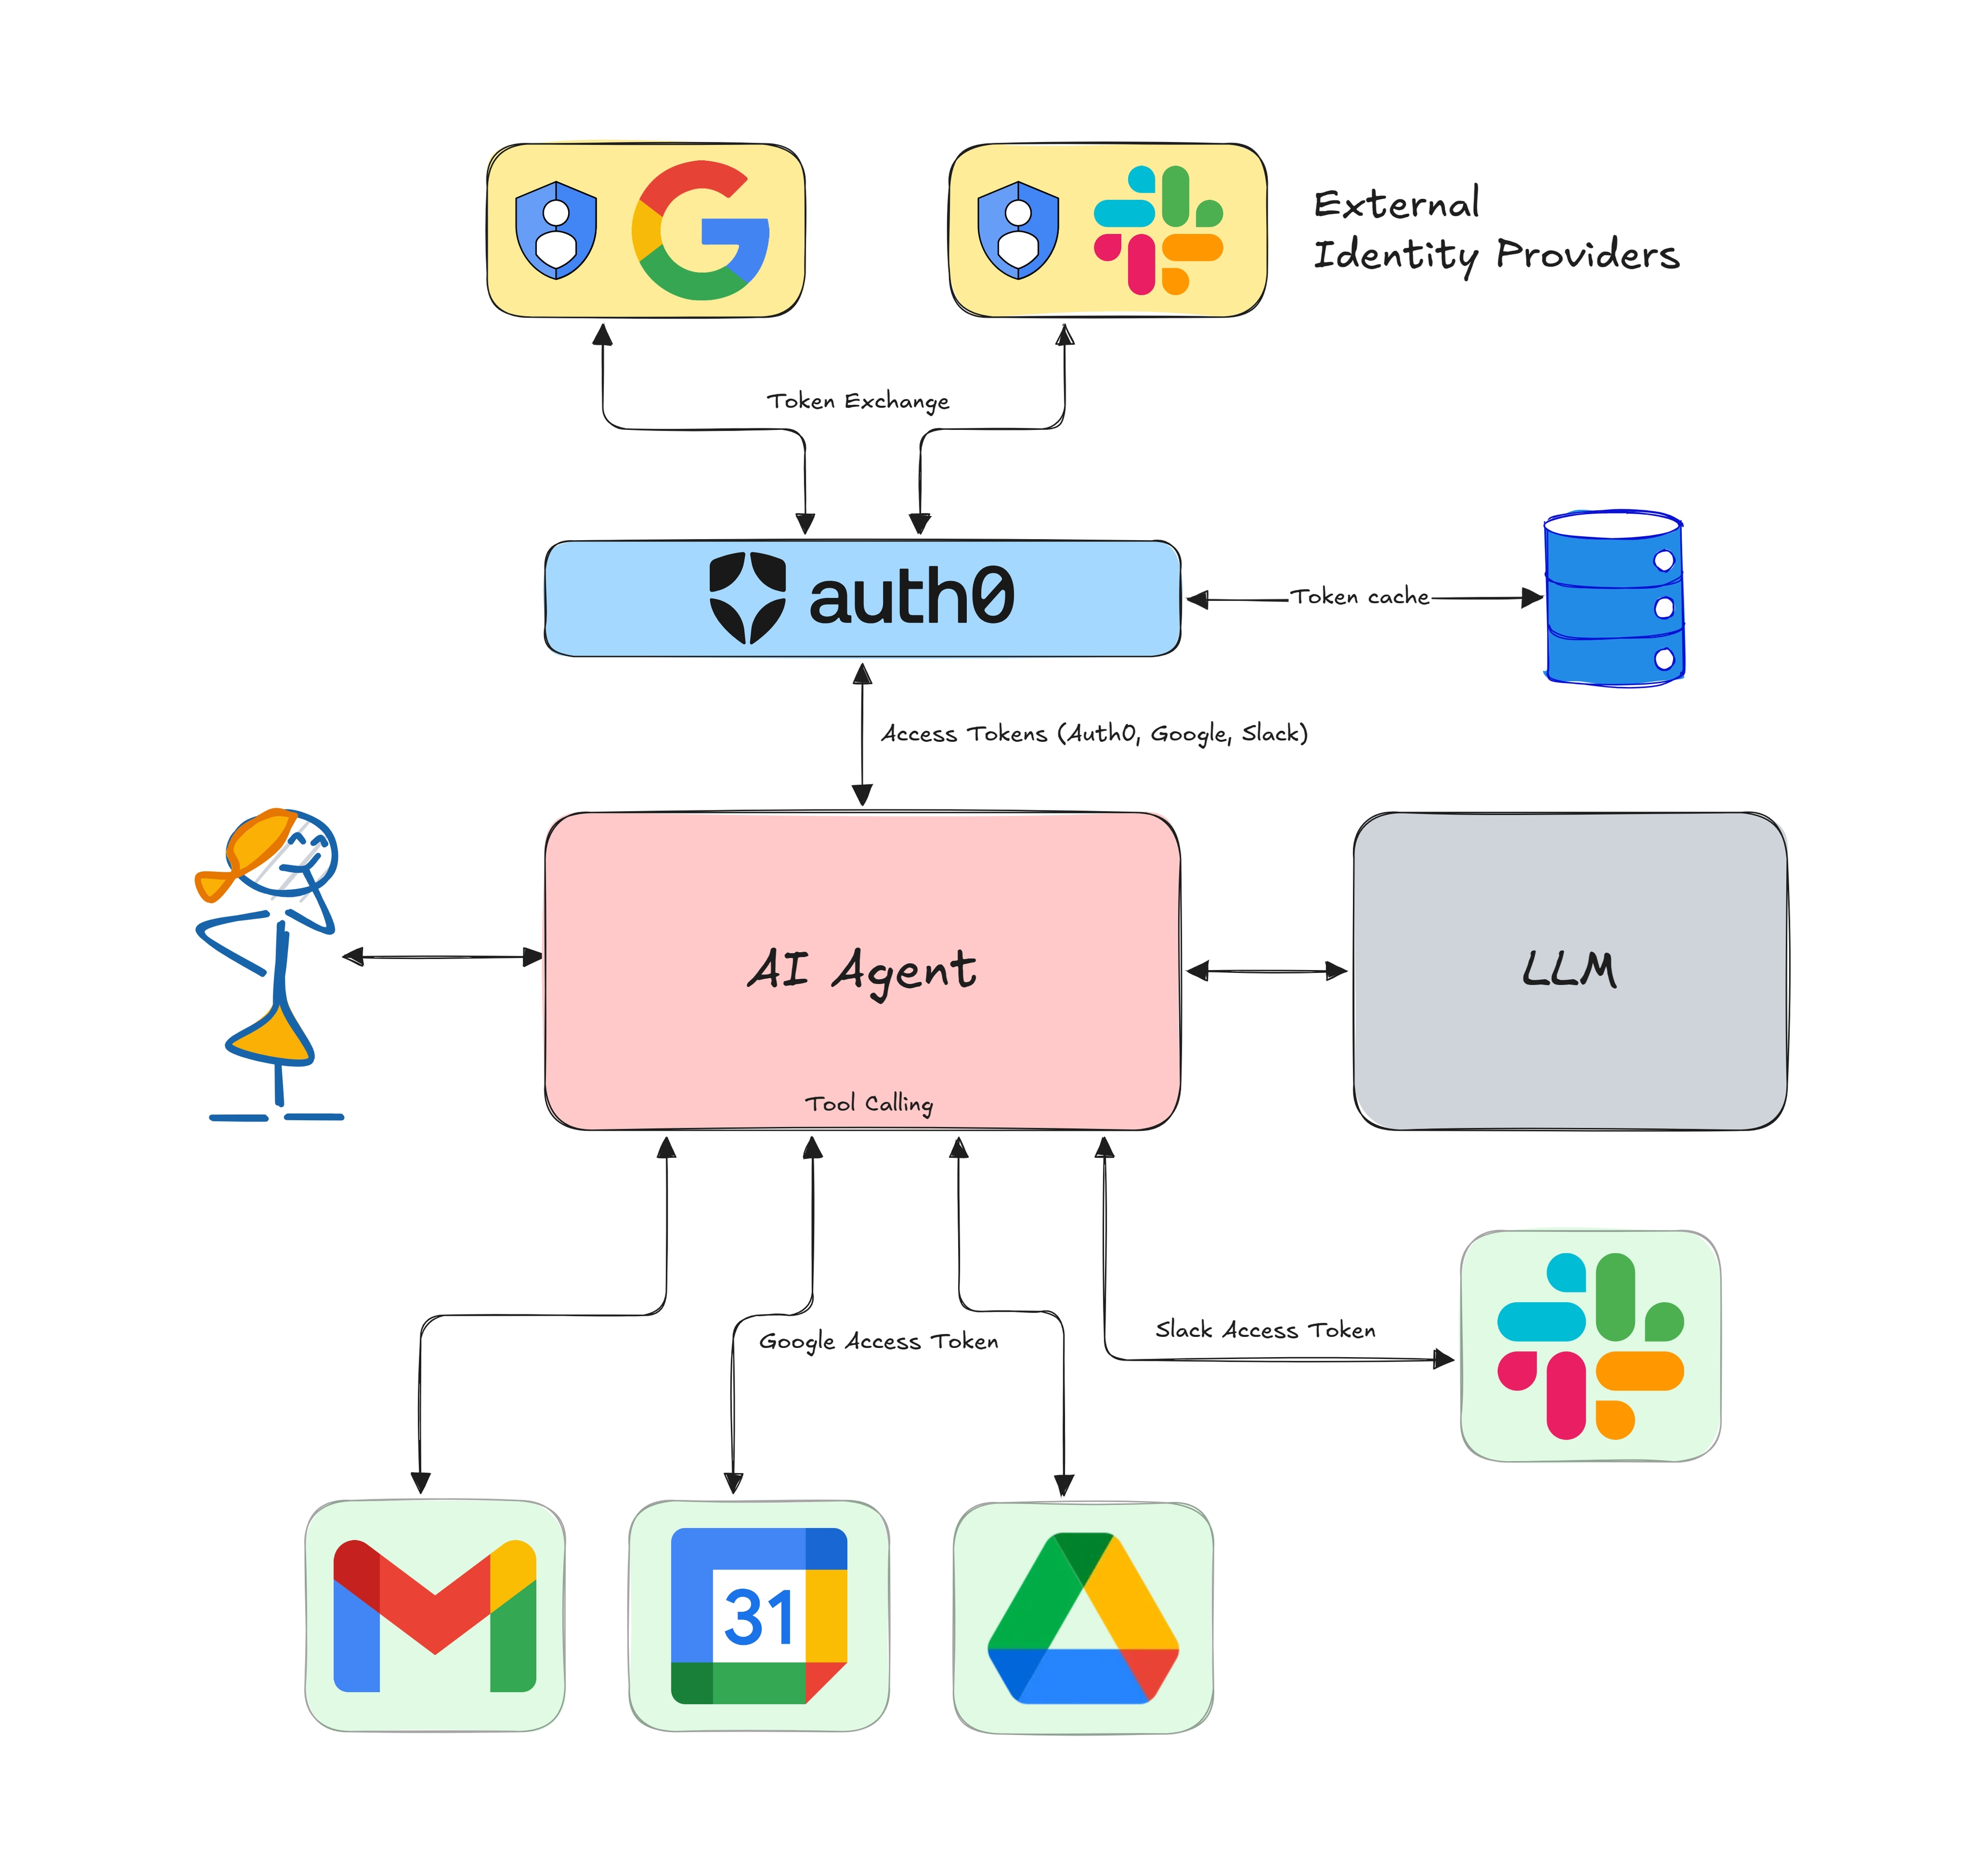
Many current solutions involve storing credentials and secrets in the AI agent application’s environment or letting the agent impersonate the user. This is not a good idea, as it can lead to security vulnerabilities and excessive scope and access for the AI agent.
This is where Auth0 comes to the rescue. As the leading identity provider (IdP) for modern applications, our upcoming product, Auth for GenAI, provides standardized ways built on top of OAuth and OpenID Connect to call APIs of tools on behalf of the end user from your AI agent.
Auth0 brokers a secure and controlled handshake between the AI agents and the services you want the agent to interact with on your behalf – in the form of scoped access tokens. This way, the agent and LLM do not have access to the credentials and can only call the tools with the permissions you have defined in Auth0. This also means your AI agent only needs to talk to Auth0 for authentication and not the tools directly, making integrations easier.
This template scaffolds an Auth0 + LangChain.js + Next.js starter app. It mainly uses the following libraries:
- LangGraph.js and LangChain's JavaScript framework for building agentic workflows.
- Vercel's AI SDK to stream tokens to the client and display the incoming messages.
- The Auth0 AI SDK and Auth0 Next.js SDK to secure the application and call third-party APIs.
It's Vercel's free-tier friendly too! Check out the bundle size stats below.
You can check out a hosted version of this repo here: //TODO
This template is derived from the 🦜️🔗 LangChain + Next.js Starter Template. It has been simplified and upgraded to fit the use case of an AI personal assistant secured with Auth0.
![]()
First, clone this repo and download it locally.
Next, you'll need to set up environment variables in your repo's .env.local file. Copy the .env.example file to .env.local.
To start with the basic examples, you'll just need to add your OpenAI API key and Auth0 credentials.
Because this app is made to run in serverless Edge functions, make sure you've set the LANGCHAIN_CALLBACKS_BACKGROUND environment variable to false to ensure tracing finishes if you are using LangSmith tracing.
Next, install the required packages using your preferred package manager (e.g. bun install or npm install).
Now you're ready to run the development server:
bun dev # or npm run devOpen http://localhost:3000 with your browser to see the result! Ask the bot something and you'll see a streamed response:

You can start editing the page by modifying app/page.tsx. The page auto-updates as you edit the file.
Backend logic lives in app/api/chat/route.ts. From here, you can change the prompt and model, or add other modules and logic.
This package has @next/bundle-analyzer set up by default - you can explore the bundle size interactively by running:
$ ANALYZE=true bun run buildThis project is open-sourced under the MIT License - see the LICENSE file for details.
This project is built by Deepu K Sasidharan.